My Process On My Podcast

Explaining My Topic

When deciding on what to discuss for my podcast, I picked the topic of Scrapbooking and Collages: The Art of Creative Hobbies On A Budget. I greatly enjoy these aforementioned hobbies, and I know how expensive artistic hobbies can be as a college student who has to stick to a budget. As such, I thought it would be beneficial to promote creative and self-expressive hobbies as a mental health outlet, while also showing that there are many ways to enjoy scrapbooking and collages using very inexpensive methods.

My Outline, Script, And Recording Plan

I wanted to be as detailed as possible when writing out the podcast, as it helps me stay organized and on topic. Thus, I utilized a pre-made outline layout for my podcast. Additionally, I will use a microphone from my University’s digital center, but use my phone for the rest of the recording process.

Outline

  1. 0-15 seconds: Podcast intro
    • Intro music 
      • (Cute, up-beat royalty free music)
    • Topic intro 
      • Hello, and welcome to Craftingly Creative! On today’s episode, we explore the art of scrapbooking and collages, a wonderful method of creative expression that won’t break the bank!
  2. 15-50 seconds: Set up and Explanation
    • Background 
      • Nowadays, even basic items like food or clothing come with a painful price tag. However, I know its possible to enjoy arts and crafts without blowing through your weekly budget. Today’s topic is scrapbooking and collaging, two hobbies that allow for plenty of creative expression in many ways, but don’t require much money to create wonderful pieces of art.
    • Why this topic is important
      • I believe that our creative interests should not get lost in a sea of bills, gas, and weekly grocery receipts. However, our hobbies shouldn’t burden us further financially, but be another outlet to enjoy life and express oneself without money stresses.
  1. 50-120 seconds
    • Mental health benefits of Scrapbooking
      • As such, one economical hobby to pick up is scrapbooking. According to Fiorito, Geiger, and Routledge, scrapbooking is the art of creating personalized albums to preserve memories and other special moments. In this way, they suggest that scrapbooking can positively affect one’s mental health, boosting nostalgia, social connections, and can promote meaning. Such benefits makes scrapbooking the perfect for combating daily stresses without worrying about extravagant expenses.
    • Mental health benefits of Collaging
      • Additionally, another spendthrift art hobby for today’s discussion is collaging. The MoMA defines collaging as “the technique and the resulting work of art in which fragments of paper and other materials are…affixed to a supporting surface”. Moreover, collaging is similar to scrapbooking in its many mental health benefits. Seregina and Brockerhoff’s art-based research on collaging’s effect on its participants during the pandemic highlighted its benefits in heightening one’s sense of community, reflecting on emotional complexities, and a greater understanding of self and personal experiences. Altogether, the two hobbies are excellent outlets for dealing with work or personal responsibilites or a relaxing use of downtime after a hectic day.
  1. 120-203 seconds
    • Economic advice on Scrapbooking
      • Along with their mental health benefits, scrapbooking and collaging offer many options to make the hobbies affordable, yet still enjoyable. For example, Jennifer Wilson’s of the Scrapbook Your Way podcast advice on scrapbooking cheaply shows that it does not take much to create wonderful pieces of art. Methods like using a printer to print scrapping supplies and using what you have on hand are particularly useful. Moreover, I suggest using free or reduced printing services at your local library to lessen the cost further. Additionally, take stock of everyday items you would usually discard and breathe new life into them via scrapbooking. Bottle caps, old paper scraps, ticket stubs, etc. All of these items you wouldn’t spare a second glance at are perfect additions to your art piece, and are all around you at no extra cost.
    • Economic advice on Collaging
      • Also, an article by Lindsey McGinnis notes thrifty options for collaging, specifically. She suggests collecting old books, magazines, brochures, and maps and using their pages which would otherwise collect dust. More often than not, these items are great additions to your art piece or can inspire your next one with the images and text they hold inside. And, don’t forget to expand your collages past 2D pieces like paper, as Artful Haven suggests. Outside materials like leaves or sticks, old buttons or fabric scraps, and dried flower petals are either free or inexpensive and add dimension to your art. 
  1. 203-232 seconds
    • Advice from personal experience 
      • Finally, some personal suggestions I have is first visiting your local antique and thrift stores for discounted items. Many of these places sell old newspapers, postcards, and other fun items at low prices for your scrapbook or collage, which is a much cheaper alternative to buying newer, expensive crafting pieces on the internet.
      • Also, don’t think you’re restricted to collaging or scrapbooking on fancy paper or photo albums. You can use old journals, line paper, or unconventional items like old records, cardboard, or even your own wall.
  1. 232-259 seconds
    • Conclusion
      • Overall, the creativity flexibility of scrapbooking and collaging is not just beneficial in improving one’s mental health and combating life’s daily stresses, especially if done economically. When using the materials around you, these two hobbies are low cost with wonderful returns.
    • Acknowledgments
      • A special thanks to the aforementioned researchers and crafters whose research and advice made this podcast possible
    • Sign off
      • Until next time, this was Arianna Salvador with Craftingly Creative!

My Process So Far

Overall, my planning and recording process has been fun and fairly easy. Writing my outline felt similar to crafting a speech for my past Public Speaking class, so it was familiar territory for me. I was probably too wordy as usual, and will have to clean up my script before the final cut. The recording process was easy, but because I didn’t have a good microphone, the sound quality was not the greatest. I did find a lot of interesting websites and research when writing about my podcast topic though, which I found interesting!

Rough Draft Recording Of My Podcast Script

View Link To My Podcast Recording

Links to Research I Found When Writing My Script

“Collage | MoMA.” The Museum of Modern Art, https://www.moma.org/collection/terms/collage. Accessed 13 Oct. 2026.

FioRito, Taylor A., et al. “Creative Nostalgia: Social and Psychological Benefits of Scrapbooking.” Art Therapy: Journal of the American Art Therapy Association, vol. 38, no. 2, Apr. 2021, pp. 98–103. EBSCOhost, https://doi.org/10.1080/07421656.2020.1748986. 

Ivana. “A Beginner’s Guide to Collaging With Tips & Ideas.” Artful Haven, 10 Dec. 2024, https://artfulhaven.com/beginners-guide-to-collaging/. Accessed 13 Oct. 2026.

McGinnis, Lindsey. “Stick With It: Time-Saving Collage Hacks for Busy Art Teachers.” The Art of Education, 19 May 2025, https://theartofeducation.edu/2025/05/may-stick-with-it-time-saving-collage-hacks-for-busy-art-teachers/. Accessed 13 Oct. 2026.

Seregina, U., & Bröckerhoff, A. (2022). Collaging Covid Holidays: Using Collage as a Communal Method for Reflection and Research. Art-Based Research in the Context of a Global Pandemic (pp. 64-79). Routledge. https://doi-org.umw.idm.oclc.org/10.4324/9781003170518-5 

Wilson, Jennifer. “SYW308 – 12 Clever Ideas for Budget-Friendly Scrapbooking – Simple Scrapper.” Simple Scrapper, 17 Sept. 2025, https://www.simplescrapper.com/syw308/. Accessed 13 Oct. 2026.
What to talk about?

Deciding on what to say

I tossed around a few ideas on what to talk about in my audio, so I turned to what I have been up to recently. I’ve been sharing the project “Post Crossing” with a lot of my friends and peers recently, because it is a fun and easy going hobby that I have been into. Post Crossing is an international program where you can send and receive post cards with members across the world, and I have been having a ton of fun with it.

From there, an outline was born

To mimic how I usually explain Post Crossing, I tried to write an outline that includes some context for the program itself, then how it works, and then send everyone off to try it out themselves. The complete outline I wrote is below. It also highlights a few other details about the other requirements as far as how I will actually record my clips and for how long.

Audio Project Outline 

Topic: I will be discussing the Post Crossing Project, which is a new hobby that I have taken up recently that has to do with sending and receiving post cards internationally. 

Introduction (20 secs) 

  • Explaining my personal background as an enjoyer of stationary and having pen pals over the years 
  • Introduce how I found out about Post Crossing  

What is Post Crossing? (20 secs) 

  • It is a program where you can sign up to send and receive post cards from people across the world  
  • It began in 2005 by Paulo Magalhães with the intention to connect people across the world despite their differences.  

How does it work? (30 secs) 

  • You create an account, request your first address, write a registration code on the postcard so it can be logged when it is received 
  • After that one is logged, your address is put into the pool to be a recipient.  
  • The cycle continues, and you can continuously have a rotation of sending and receiving cards 

My experience with it (30 secs) 

  • Describe some of the post cards I have gotten and sent 
  • Explain the tools on the website that let you look at the data around cards you’ve sent and received 

Conclusion (20 secs) 

  • Post Crossing is a neat project that anyone can be apart of  
  • Mail can be fun for anyone, and I am really enjoying it  

I plan to use my phone to record my audio in a quiet space- likely in my living room when no one is home. For sound effects, I will look for some sound clips from freesound.org to insert in the beginning and end of my audio. 

My process (so far…)

My experience with recording audio is slim, but I have done it before for video essay assignments. I’m most familiar with recording right onto things like CapCut, so it felt a little odd to just record myself on my phone. Recording voice memos feels like recording a voicemail, honestly. I tried to embody the cadence of natural conversation, because I have a history of being incredibly monotone in the past in assignments.

For my sound effects, I located a website named “freesound.org”, and snagged an instrumental from there that is under “Creative Commons 0”. I plan to insert that at the beginning and end of my audio so that it mimics a podcast. I’ll probably utilize CapCut or something similar to accomplish this, too.

Here is a link to a OneDrive file containing both my own recorded audio and the instrumental audio that I will be using for this project.

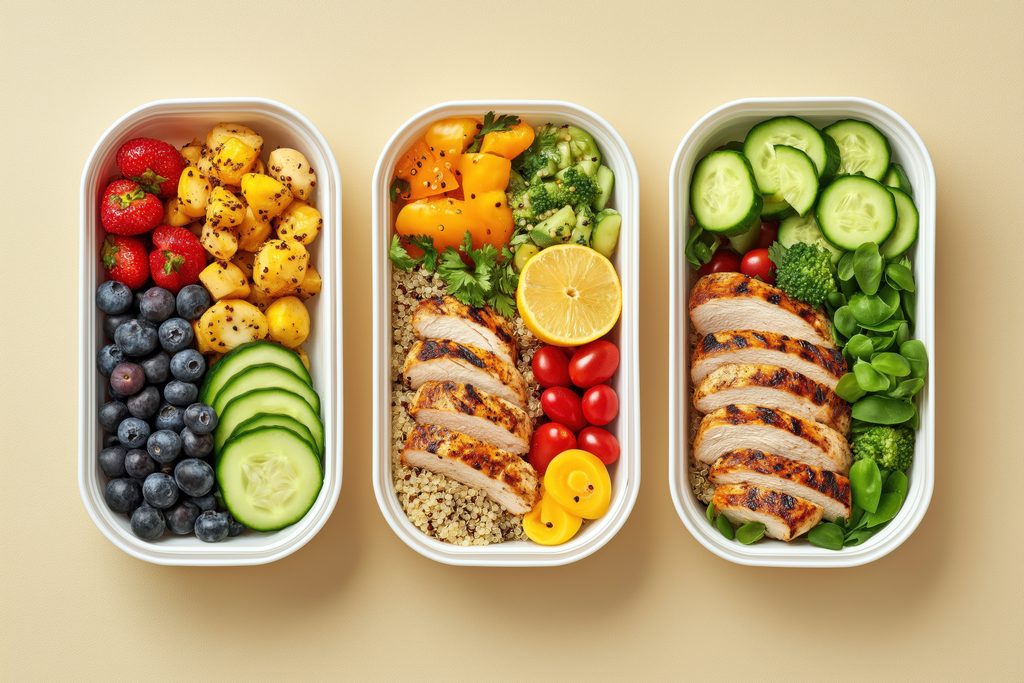
Meal Prepping for Beginners: A Podcast

Picture by Dreamdecko from Pixabay.
The Transcript

[Speaker: Frankie Wulf] My name is Frankie Wulf and today I’ll be sharing tips about meal prepping for beginners. Meal prepping is a useful way to save time, money, and improve your overall nutrition. I grew up in a household where leftovers were a staple. Having two parents who both worked full-time meant there wasn’t time to cook fresh dinners. As a full-time college student working two jobs, I’ve found myself with similar time constraints. On top of a lack of time, I’ve also got a limited budget. Enter meal prepping. 

[Sound of chicken being fried in a pan.] 

So, where to start? In my experience, meal prepping is best done at night. The goal is to cook a big dinner that can be packed away and reheated for lunch and dinner the rest of the week. Almost any food can be meal prepped, as long as it’s got a shelf life (when cooked) of at least 3 days. Foods that spoil quickly, like leafy greens and raw fish, should generally be avoided. When in doubt, I’d recommend referencing the refrigeration guidelines set by the FDA to play it safe.  

Other than shelf life, recipe yields are something to take note of. You’ll want to find recipes producing four portions at minimum. I usually search for budget-friendly recipes designed to feed families. You can find meal prep recipe ideas in books (I like The Healthy Meal Prep Cookbook by Toby Amidor) or online (my favorite recipe-sourcing websites include BudgetBytes and The Pioneer Woman). They’re easy to follow and make delicious results.  

[Sound of water being boiled in a pot.] 

The cost-effective and time-saving nature of meal prepping makes it a suitable way of preparing food for anyone, regardless of what point of their life they’re at. Meal prepping has benefits for everyone. And if you’re still not convinced, try meal-prepping for yourself and experience the results in real time. 

How It’s Made

Recording this podcast was low-budget and required only some creativity. I used my smartphone as my recording device (with the Voice Memo app) and the back seat of my car as my recording studio (as well as my kitchen stovetop). To edit the podcast, I used the free browser-based program Soundtrap exclusively.

Attributions

See refridgeration guidelines set by the FDA.

For readings about meal prepping, I check out this cookbook by Toby Amidor on Amazon.

For finding meal prepping recipes, I suggest checking out BudgetBytes and The Pioneer Woman.

Podcast Creation Progress

My Topic

My podcast explores why some women are leaving conservative evangelical churches, focusing on how purity culture, traditional gender roles, and church responses to sexual abuse can influence their decisions. I discuss how these teachings and experiences can affect women’s views of themselves, their sexuality, and their trust in religious institutions. I also look at research on how women who experience abuse are treated by their congregations and how these experiences can contribute to their decision to leave.

Podcast Outline: Why Are Women Walking Away From the American Evangelical Church?

0:00-0:08 | Intro Music

  • Play a short instrumental introduction that sets a reflective tone.

0:08-0:20 | Introduction

  • Introduce the idea that churches are often expected to provide love, safety, and community.
  • Ask what happens when a church becomes a source of harm.

0:20-0:40 | Why People Leave Religion

  • Introduce research from the Public Religion Research Institute.
  • Share statistics about former evangelical Protestants who cited religious scandals and negative teachings about LGBTQ people as reasons for leaving their religion.

0:40-1:05 | Purity Culture and Gender Roles

  • Explain how purity culture is taught in some evangelical churches.
  • Discuss how women in churches that teach purity culture are often taught to remain virgins until marriage, dress modestly, and take responsibility for men’s sexual behavior.
  • Explain how these teachings can shape women’s understanding of their bodies, sexuality, and worth.
  • Discuss how traditional gender roles in some evangelical churches teach women to submit to male authority.

1:05-1:30 | Abuse and Church Responses

  • Present research about women who experienced sexual abuse by clergy.
  • Explain the findings about how congregations responded when women disclosed abuse.
  • Introduce research examining abuse survivors who left evangelical churches.

1:30-1:50 | The Harm and Its Consequences

  • Discuss how purity culture, restrictive gender roles, and dismissive responses to abuse can affect women.
  • Explain how being blamed or ignored by a trusted religious community can damage that trust and contribute to decisions to leave.

1:50-2:00 | Conclusion

  • Emphasize that women’s decisions to leave should be understood in the context of their experiences.
  • End with the question: “So perhaps we shouldn’t only ask why women are walking away from the church. We should also ask what has made staying so difficult.”

Summary of Process

I recorded the podcast indoors using my Mac and DJI Mic 2 Wireless Microphone. I focused on clear narration so the research and main points would be easy to follow. I recorded many takes but landed on three takes of the same script. Two recordings go together because I stopped and restarted, while the third is a separate take. I made several mistakes and had to restart parts of the narration, but I kept the original recordings unedited for this checkpoint. During post-production, I plan to choose the parts I like best from each take to put together my final podcast.

I also recorded a few sound effects that I might use, including pages turning, a book slamming shut, and a door opening and closing. I haven’t decided exactly where I’ll use them, and I may not include all of them in the final version. I’ll decide which sounds fit best with the topic and whether I need to record any additional sounds when I put everything together.

Here is my OneDrive folder with my original podcast recordings and sound effects.

Sources

  1. PRRI article about why people leave their religion
  2. Qualitative Sociology study about abuse survivors leaving evangelical churches
  3. Social Work study about women sexually abused by clergy

Audio Project: Pre-production and Production

Choosing a topic

I am a big fan of the artist Billy Strings, so I chose to do my project about him. I narrowed the topic down to his unique style because that is a large part of what I like about his music. The podcast will focus on all the different music that influences his style.

Pre-production

After choosing the topic, my pre-production process began with research. I read a few articles and interviews and identified three major influences, which would become the main points.

Next, I wrote an outline based on the sample Cartland gave. I made some minor changes to the format and wrote a script for each section.

Finally, I made a recording plan that laid out my equipment and location, each bit of audio I needed, the order I planned to record in, and my recording technique. I also included notes I took after recording; more on that in the production section.

Topic: How/why Billy Strings’ music is different from traditional bluegrass

0-20 seconds

Intro music: Something played by Jameson

Intro: Hello all…

(Intro music fades out) Topic intro: Today’s discussion will focus on the influences on Billy Strings’ music that serve to set it apart from traditional bluegrass

20-40 seconds

Background on topic: Thanks to his dynamic approach to the typically very traditional genre of bluegrass music, the Grammy Award-winning guitarist Billy Strings has grown a cult following as well as mainstream status 

Why this topic is important: His presence in the bluegrass scene has been backed by new fans and spirit, re-energizing the sphere

40-60 seconds

First point about topic: Strings learned guitar from his dad, who brought the bluegrass.  He grew up steeped in the same traditional bluegrass that his music is mostly based on.  The influence of traditional bluegrass guitarist Doc Watson is quite noticeable in his technique, but is also frequently acknowledged by Strings as a major inspiration.  

60-80 seconds

Second point about topic: When he was a teen, Strings brought his talent to the stage, playing with a heavy metal band.  In an interview for the Bluegrass Situation, Strings said that he never learned how to perform like a bluegrass musician, citing his metal experience as the origin of his distinctive flair; Strings “can’t just stand there and play.”

In my opinion, live performance is where Billy’s light shines most purely.  His shows are bursting with energy and possess an animation not often seen in the conventional world of bluegrass.  

80-100 seconds

Third point about topic: Today, Strings listens to a wide variety of genres including Memphis trap and heavy metal.

100-120 seconds

Conclusion: His music taste is extremely diverse, a quality that bleeds into his work, creating a distinct style that draws fans in flocks.

Acknowledgments: This podcast was written and produced by Riley Evans, with music by Jameson Atkins

(Outro music by Jameson fades in)Sign off:  Thank you for tuning in to this exploration of Billy String’s musical influence

(Just music→fades out, ends at 2 minute mark)

Recording plan:

Record on my iPhone in a dorm room

Record quiet room first  (ended up with two versions)

Record into music; written by Jameson; place phone about a foot away from guitar; should be 10-12 seconds (Ended up with 2 versions and five takes)

Record ambient room noise; guitar tuning noise; fridge noises; hallway noise;

Record spoken component topic by topic (ended up with 10 usable recordings)

Record outro music; written by Jameson; place phone about a foot away from guitar; should be 10-12 seconds (Ended up with 1 take)

Sources

Local Spins article about the development of Billy Strings’ music

Live Music Daily article about Billy Strings bringing bluegrass to a wider audience

The Bluegrass Situation Interview with Billy Strings about his musical influences

Production

My unedited recordings can be found here

Plan and Equipment

I was off campus while working on the project, so I used my iPhone as my recording equipment. As recommended, I placed my phone about a foot away when recording.

I used my plan as a recording checklist, editing it as I went with the specifics of the recording process. Specifics include things like recording distance and the number of takes

Recording Ambient Noise

It was hard to record relevant noise in the dorm building, so I tried to record a couple of different sounds. I recorded a mini fridge with my phone super close by, I recorded the noise in the hallway, and I recorded guitar tuning noise (more on the licensing of the guitar sounds below).

I also recorded the room I planned to record in while it was quiet to edit with.

Recording Music

A requirement of the project was to use copyright-free music throughout the podcast. During the production phase, I was visiting my boyfriend, who plays guitar. He offered to play original music for the intro and outro. He agreed that the music he played for the podcast would be licensed under CC BY 4.0, like all the work on my site. I thought this theme music would fit well with my topic, as Billy Strings’ main instrument is guitar.

I placed the phone about a foot away from the center of the guitar while recording, and did multiple takes of the intro.

Recording the Spoken Components

I recorded my voice section by section. I placed the phone about a foot away from me and took a couple of takes of each.

My First Recording

Audio Project

My audio project is going to focus on a day in the life of someone who works in a restaurant. I plan to use my voice and some sound effects to portray what it is like to work in a restaurant.

Recording Plan

For my recording plan, I plan to film the voice recording in my own home, but in a private room so there wouldn’t be any background noise. I plan to use my iPhone for the actual recordings and my laptop to do the bulk of the work. I plan to use a printing sound for the printing tickets in the kitchen, a trombone sound for an unfortunate event that will happen in my recording, and lastly a squeaky sound to represent all the cleaning you have to do in a restaurant. I am also planning for each section to be around 30 seconds to a minute.

Outline

  • Intro Song- 10 seconds
  • Introductio- 30 seconds
  • Main Section- 50 seconds
  • Background sounds- 10 seconds
  • Conclusion- 20 seconds

The Process

For the actual process of my recording, I decided to do the bulk of the recording and sound effects on my phone, but later sent the end product to my laptop to upload to my OneDrive. I did end up recording in my home, but in a separate room with the door closed so there wouldn’t be any outside noise that could interfere with the audio. I did end up needing to record about three takes until I was satisfied. After recording the first attempt, I realized I was short on time and could add a little more. For the second recording, I realized I needed to reword my phrasing because it didn’t flow the way I wanted it to. I finally went with my third attempt, which was the time frame I wanted, and I liked the flow. While recording I found it difficult to get the right sound effects I wanted. Some weren’t quite the sound I was lloking for or there was too much background noise happening and it wasn’t clear. Eventually I did land on the sound effects I thought would be perfect for my recording.

Emma’s Recordings

Recording My Podcast: The Process

How It’s Going

Topic Summary

I decided to make the topic of my podcast about meal prepping. Meal prepping is an important way of life for me, and has saved me both time and money. I think trying to convince my peers (and others) to meal prep at home by their own plans– rather than rely on fast food, delivery services, or even expensive meal prep services like HelloFresh– is a worthy cause that can benefit everyone.

The Recording Process

To save time and effort, I chose to use my smartphone as my recording device through the Voice Memos app. I have recorded “podcasts” in the past in my car, so I was already aware of its efficiency as a recording studio. Initially I recorded one take of my script reading in my bed to figure out how long it would take me to read each part. I then moved to my car (at night so the parking lot was quiet) and recorded in the driver’s seat. There were some issues with sounding overly-muffled, which I realize had to do with my voice bouncing off the windshield. I then moved into the rear seat and put my phone on the floor behind the passenger seat– essentially enclosing it with seats/the car door on all sides. I leaned over my phone and spoke into it. This produced the best audio takes yet, with no echo or trace of muffling.

There were some trials and errors with recording the sound effects, too. I waited until my roommates weren’t hope and recorded the sound effects in the kitchen. I took a leftover omelet, doused a frying pan and oil and fried it. Due to the flat surface area of the omelet, I realized it didn’t produce the crisp crackling/frying sound I was looking for. I then put a single chicken nugget in the super-hot pan and produced an adequate crispier crackling sound effect. I also boiled a pot of water, but realized a rolling boil sounded more like a hiss than a bubble. I decided to mix old alfredo sauce with the water to thicken it, and it produced the pronounced bubbling sound effect I was looking for.

Click here for the link to the OneDrive folder housing my script and sound effect recordings. Included in this file is a folder containing audio bloopers/mess-ups for the sake of authenticity.

My Script/Outline

[This educational monologue will be recorded using my smartphone in my car. I have chosen my car as it is an enclosed space with minimal echo and decent soundproofing. I have used my car as a recording studio in the past with excellent results.] 

*** Time markers are estimated. Exact time markers will be determined after editing.

0-7 seconds: [introduction music] 

8-17 seconds: My name is Frankie Wulf and today I’ll be sharing tips about meal prepping for beginners. Meal prepping is a useful way to save time, money, and improve your overall nutrition.  

18-35 seconds: I grew up in a household where leftovers were a staple. Having two parents who both worked full-time meant there wasn’t time to cook fresh dinners. As a full-time college student working two jobs, I’ve found myself with similar time constraints. On top of a lack of time, I’ve also got a limited budget. Enter meal prepping. 

36-41 seconds: [Sound of chicken being fried in a pan, recorded by myself with my smartphone in my kitchen.] 

41-68 seconds: So, where to start? In my experience, meal prepping is best done at night. The goal is to cook a big dinner that can be packed away and reheated for lunch and dinner the rest of the week. Almost any food can be meal prepped, as long as it’s got a shelf life (when cooked) of at least 3 days. Foods that spoil quickly, like leafy greens and raw fish, should generally be avoided. When in doubt, I’d recommend referencing the refrigeration guidelines set by the FDA to play it safe.  

74-96 seconds: other than shelf life, recipe yields are something to take note of. you’ll want to find recipes producing four portions at minimum. I usually search for budget-friendly recipes designed to feed families. You can find meal prep recipe ideas in books (I like The Healthy Meal Prep Cookbook by Toby Amidor) or online (my favorite recipe-sourcing websites include BudgetBytes and The Pioneer Woman). They’re easy to follow and make delicious results.  

104-109 seconds: [Sound of water being boiled in a pot, recorded by myself with my smartphone my kitchen.] 

109-116 seconds: The cost-effective and time-saving nature of meal prepping makes it a suitable way of preparing food for anyone, regardless of what point of their life they’re at. Meal prepping has benefits for everyone. And if you’re still not convinced, try meal-prepping for yourself and experience the results in real time. 

116-120 Seconds: [outro music] 

Audio Project – Checkpoint

Recording Process

My Topic

My topic for this audio project is “Strength training improves soccer performance.” I chose this topic because I am a college soccer player here at UMW and I believe that more athletes need to strength train to help their performance. This topic helps athletes get faster, prevent inures, and help with endurance, which is all traits to make them better soccer players.

Outline/Script

“Why Strength Training Improves Soccer Performance”

2-Minute Audio Project Structure

0:00-0:07
Brief copyright-free intro music

0:07-0:20
Introduction:

“When people think about soccer training, they often focus on running, dribbling, and passing. But one of the most important factors in athletic performance is strength training.”

0:20-0:50
Main Point 1: Explain how strength training improves sprint speed and explosiveness.

  • By doing squats, lunges, and RDL’s with weight it builds stronger muscles, which helps soccer players sprint faster and change direction more quickly.

Sound Effect #1 (0:50-0:55) Weight plates clanking and Dumbbell rack sounds

0:55-1:25
Main Point 2: Explain how strength training helps reduce injuries by supporting muscles, joints, and ligaments.

  • When you strength train, you build strong muscles and having strong muscles supports your joints and lower the risk of common soccer injuries.

Sound Effect #2 (1:25-1:30) On soccer field kicking a ball

1:30-1:53
Main Point 3: Discuss how strength training improves endurance and helps players maintain performance throughout a match.

  • Soccer is a sport all about endurance. By doing strength training you enable stronger muscles which means your body works more efficiently, helping players perform better throughout an entire game.

1:53-2:00
Conclusion:

” So, whether you’re a beginner or a college athlete, strength training can help you become faster, stronger, and more resilient on the field.”

Summary of Process

For my process I started with coming up with a topic. After that, I researched the idea and created my script. Finally, I recorded my audio, and I now have my draft for the recording. I recorded my audio using my voice memos app on my phone. My phone has a great microphone, and the surround area was super quiet. So, I was able to get results and no background noise. Overall, it was a smooth process for me and was able to get great audio.

Link to OneDrive with recording

Digital Studies- Audio Project

What is real on the internet?

So much of the internet, both now and the in the past, has been affected by, or the cause of, the spread of misinformation. Misinformation has been pervasive throughout the internet’s history and speaks to a larger, structural relationship between free and open communication. Without the intervention of fact-checking, any given piece of communicated information is at risk of, regardless of intention, being misconstrued and added to the already gargantuan pile of misinformation.

Reasons for Misinformation on the Internet

I think one of the most clear and obvious reasons for the spread of misinformation on the internet is the intentionally large space for individual users to generate content, platforms, conversations, etc. This radical shifting of how communication and media is transmitted from past technological generations decentralizes so much of broadcasting. Thus, rather than large teams of trained professionals working to create, for example, an educational science show, individuals, who are much more prone to make mistakes or be affected by personal bias, instead provide that type of content. By this measure, much of misinformation online can be explained by the simple mistakes of individuals.

Aside from these simple mistakes, however, lies a broad swath of interlocking sociological and psychological components that generate the growing apparatus of internet misinformation. Multiple sources, including a 2016 article titled “The spreading of information online,” have outlined two main components to the spread of misinformation: human psychology and algorithmic amplification. Social media platforms, in particular, although these systems branch out to other parts of the internet as well, actively choose to prioritize content that receives the most engagement rather than content that, for example, contains the most factual information. Obviously that’s a simple conclusion about social media algorithms, but the architecture of these platforms being designed to use human’s susceptibility to confirmation bias and echo chambers showcases a clear effort to deprioritize non-misinformation if it comes at the cost of engagement.

AI’s Role in Misinformation on the Internet

It is impossible to talk about misinformation (or really anything on the internet) without mentioning the growing institution of AI. Truly, its nearly impossible to say anything new on the subject. My personal opinion is that AI is used as a tool for misinformation in two ways. Neither of which are good, but one of which is, to me, not necessarily groundbreaking. The first form of misinformation influenced by AI refers to the “hallucinations” or simple factual errors chatbots routinely make. Although these can be worrisome, especially considering many people now think of chatbots as nearly as good, or just as good as an authority in any given field its asked about, I don’t think AI is spreading more misinformation than normal through this means of communication. I think, in many cases, those people who are using chatbots for simple factual knowledge such as this and find hallucinations are just as likely to find incorrect factual information on the open internet. Not to say that the spread of misinformation in this regard is irrelevant, I just don’t think its groundbreaking.

On the other hand, the second form in which AI spreads misinformation is, I think, much more pressing. In particular, the tendency for creators on social media to use AI to actively spread misinformation and disinformation can be extremely harmful. These videos can have a veneer of legitimacy due to their perceived high production quality when compared to misinformation streams of even the recent past and, as such, can easily lure people in. I think these instances of AI-spread misinformation are much more important to identify and address.

AI Chatbot Experiment

The prompt I asked the three chatbots was “What are a couple of good framing devices and tactics when writing the third speech for either Proposition or Opposition for a World Schools style debate? Please cite sources whenever possible.” They each responded as such:

For a World Schools third speech, your job is usually to win the debate, not add a new case: rebut the opponent, clarify your side’s logic, and give the adjudicator a clean way to compare the two teams.

Useful framing devices

  1. “This debate is really about…” Reduce the motion to the central clash.“This debate is really about whether protecting people from predictable harm outweighs the loss of individual choice.”
  2. Comparative weighing Compare impacts using clear criteria:
    • Magnitude: Which harm is bigger?
    • Probability: Which outcome is more likely?
    • Timeframe: Which happens sooner or lasts longer?
    • Scope: Who is affected?
    • Reversibility: Can the harm be undone?
    “Even if Opposition proves a cost to autonomy, our side still wins because the harm we prevent is larger, more likely, and irreversible.”
  3. Burden framing Explain what the other side needed to prove but failed to establish.“Opposition has shown that this policy is imperfect, but not that it is worse than the status quo.”
  4. Principle versus implementation Separate whether the idea is desirable from whether every detail is perfect.“The question is not whether our policy solves everything; it is whether it produces a better outcome than doing nothing.”

Effective tactics

For a World Schools third speech, think less like a new advocate and more like the person who tells the judge what the debate was really about and why your side won. The third speaker should not introduce new substantive arguments; the core job is rebuttal, rebuilding, clash organization, and weighing. 1 2

1. Frame the debate around two or three decisive clashes

Do not organize the speech chronologically—“their first speaker said…, then our second speaker said….” Instead, group the debate into the major questions the judge must answer. 1 3

Useful clash frames include:

  • Does the policy actually achieve its goal?
  • Which side bears the greater harm or benefit?
  • Is the policy fair, legitimate, or enforceable?
  • Should we prioritize individual autonomy or collective welfare?
  • Even if the other side gets some benefit, is it large enough to justify the costs?

For each clash, use this sequence:

  1. State the question: “The first issue is whether this policy actually reduces harm.”
  2. Represent their best argument fairly.
  3. Explain why it fails: attack the mechanism, evidence, assumptions, or response to your team.
  4. Rebuild your side’s analysis.
  5. Weigh the result: explain why winning this clash matters to the ballot.

This gives the adjudicator a ready-made decision structure; a strong third speech resolves clashes rather than merely repeating rebuttals. 1 3

Proposition example

“The first clash is whether the ban meaningfully reduces pollution. Opposition gives us inconvenience, but they never show that these costs outweigh the large, predictable reduction in emissions. On the central policy question, Proposition still wins.”

Opposition example

“The first clash is not whether the policy has an attractive goal; it is whether this particular policy achieves it without imposing disproportionate harm. Proposition has shown an intention, but not a credible mechanism.”

2. Use a clear judging metric or principle

Give the judge a test for evaluating the round, then show that your side satisfies it better. This is especially useful when both teams claim benefits but disagree about what matters most.

Possible metrics:

  • Net welfare: Which side produces the better overall consequences?
  • Protection of the vulnerable: Which side better protects people with the least power?
  • Necessity and proportionality: Are the harms justified by the benefits?
  • Feasibility: Which side has a credible mechanism that can work in practice?
  • Rights or legitimacy: Which side better respects autonomy, equality, or democratic accountability?

A good metric should not be an abstract slogan. Tie it to the motion and use it comparatively:

“The question is not whether Opposition identifies a cost. The question is whether that cost is large enough to defeat a policy that prevents substantially greater harm.”

Third speakers are rewarded for selecting the issues that matter and explaining why those issues decide the debate; strategy is a distinct part of World Schools adjudication. 1 3

Tactics that make either frame effective

Compare, do not merely rebut

Use explicit comparison:

  • “Our impact is larger because…”
  • “Our harm is more likely because…”
  • “Our benefit occurs earlier and affects more people.”
  • “Their argument depends on an assumption they never established.”
  • “Even granting their best point, our side still wins because…”

The third speaker’s distinctive contribution is comparative weighing—showing what survived the debate and why it matters more—not simply summarizing what each team said. 1 2 3

Concede strategically

You do not need to claim that your team won every minor point. Concede a limited issue, then make it irrelevant:

“Even if Opposition is right that implementation is costly, that does not decide the debate. The relevant comparison is whether those costs outweigh the serious harm our policy prevents.”

Strategic concessions can increase credibility and allow you to identify which clashes are genuinely decisive. 3

Prioritize rather than cover everything

Choose two or three major clashes and spend enough time explaining them. A long list of tiny responses often sounds like line-by-line rebuttal without a clear reason to vote. 1 3

End by cashing out the ballot

Your final minute should answer:

“Given everything in this debate, what should the judge write on the ballot?”

For example:

“Opposition wins that the policy has transition costs, but Proposition wins the central question: whether the policy prevents greater and more certain harm. Because that is the motion’s decisive impact, Proposition wins the debate.”

A compact third-speaker structure

  1. Opening frame: “This debate comes down to two questions.”
  2. Clash one: Their best case → rebuttal → your rebuild → weighing.
  3. Clash two: Their best case → rebuttal → your rebuild → weighing.
  4. Optional clash three: Only if genuinely necessary.
  5. Final ballot story: State the metric, identify what your side wins, and explain why that is decisive.

For Proposition, emphasize why the Opposition’s objections do not outweigh the motion’s benefits and why your model or principle works. For Opposition, emphasize the motion’s failure conditions: lack of mechanism, disproportionate harms, unfair distribution, rights violations, or a better alternative. In both cases, the final speech should be a judgment about the debate—not a fourth constructive speech. 1 2

Sources

  • 1 Capstone Debate, World Schools Debate Format: Rules, Roles and Scoring
  • 2 DebateTab, World Schools debate speaker roles explained
  • 3 WSDC Academy, Third Speaker (Whip) in World Schools Debate
  • 4 World Schools Debating Championships, official resources and adjudicator guide materials

Here are two strong framing devices and tactics for the third speech in World Schools debate:

1. The “Collapse” Structure with Weighted Questions

One of the most effective framing strategies is what debaters call a “collapse”—narrowing the debate down to one or two major issues rather than covering everything. 1 A common approach is to frame the debate as a series of strategic questions, then show why your team wins the most important ones.

For example, on a motion about space tourism, a third speaker might frame it as: 1

  • Does space tourism provide economic benefits?
  • Is it principally just to spend money on space tourism?
  • Does space tourism produce innovations useful on earth?

Each question gets at a different dimension of the debate. The third speaker then identifies which 1-2 questions are truly decisive and explains why their side’s analysis is superior on those points. 2 This approach makes it easy for the judge to see exactly where your team comes out ahead.

2. The Narrative-Driven Frame (Core Values Analysis)

A strong third speech relies heavily on narrative—identifying the core ideas your side stands for and explaining why they’re fundamental. 1 Rather than just listing rebuttals, frame the entire round as a clash of competing values or principles.

For instance: “This debate comes down to one central question: does the motion prioritize X principle (economic efficiency, human dignity, etc.) over Y principle? Our team has shown throughout this debate that X principle is both more logically sound and practically more defensible because…” 1

This framing gives judges a clear interpretive lens for understanding all the earlier arguments. It transforms scattered rebuttals into a coherent narrative where your team’s side emerges as more principled and internally consistent. 2

Key Tactical Elements to Both Approaches

Regardless of which frame you use, maximize your third speaker’s effectiveness by: 2

  • Pinpointing 1-3 critical clashes rather than trying to cover everything
  • Providing direct comparison between your side’s and the opposition’s arguments on these key issues
  • Persuasively explaining why your team wins on balance, making it obvious to the judge which ballot to sign 2
  • Using your protected time strategically—the final minute to synthesize your winning argument and lock in the judge’s thinking

The third speaker’s job is to give judges “a clear, biased lens through which to view the round, making it easy to sign the ballot in [your] favor.” 2

Here are two effective framing devices and three tactical approaches for the third speech (Reply Speech) in a World Schools Debating Championships (WSDC) format, specifically for either Proposition (Government) or Opposition. These are grounded in WSDC adjudication norms and coaching resources:


Framing Devices

  1. The “Clash Matrix” Frame
    • What it is: Structure your speech around a 2×2 or 3×3 grid of the key clashes in the debate, explicitly labeling where your side wins and where the opposition fails. This forces clarity and ensures you address all major arguments.
    • How to use it:
      • Open by saying: “This debate hinges on three core clashes: [X], [Y], and [Z]. We win [X] and [Y], and on [Z], the opposition collapses because…”
      • Use a visual aid (if allowed) or describe the matrix verbally. For example:ClashProp PositionOpp PositionWho Wins?Moral Duty[Your argument][Their argument]PropFeasibility[Your argument][Their argument]PropAlternativesN/A[Their argument]Opp (but irrelevant)
    • Why it works: Adjudicators love comparative analysis, and this frame makes it effortless for them to see why your side prevails. It also preempts the opposition’s attempts to reframe the debate.
    • Source: Adapted from the WSDC Adjudication Core Manual (2023), which emphasizes “comparative weighing” as a key criterion for Reply Speeches. The matrix itself is a tactic popularized by teams like Singapore and Australia in the 2022 and 2023 WSDC Grand Finals.
  2. The “Story Arc” Frame
    • What it is: Frame the debate as a narrative where your side’s arguments form a coherent, compelling story, while the opposition’s case is fragmented or contradictory. This is especially useful for value-driven debates (e.g., human rights, ethics).
    • How to use it:
      • Open with: “This debate isn’t just about isolated arguments—it’s about two competing visions for [topic]. Ours is a story of [X], while the opposition’s narrative falls apart because…”
      • Example for a debate on “This house would ban deepfake pornography”:
        • Prop story: “A story of dignity, consent, and protecting the vulnerable from exploitation.”
        • Opp story: “A story of censorship, slippery slopes, and distrust in technology—until you realize their arguments contradict each other.”
      • Highlight internal contradictions in the opposition’s case (e.g., “They claim this is about free speech, but their own examples show how deepfakes silence women.”).
    • Why it works: Humans are wired to remember stories, and adjudicators are no exception. This frame makes your speech memorable and persuasive by tying arguments to a larger theme.
    • Source: Inspired by Harvard Debate Council’s training materials on “narrative debating,” which cite cognitive psychology studies on storytelling in persuasion (e.g., The Storytelling Animal by Jonathan Gottschall). Also used by Team Canada in the 2021 WSDC Finals.

Tactical Approaches

  1. The “Two Worlds” Tactic
    • What it is: Contrast the world your side creates with the world the opposition creates, using vivid language to show why yours is superior. This is a micro-version of the story arc but applied to specific arguments.
    • How to use it:
      • For each major argument, say: “In our world, [positive outcome]. In their world, [negative outcome].”
      • Example for “This house would make voting compulsory”:
        • “In our world, elections reflect the will of the people, and politicians are accountable to all citizens. In their world, elections are decided by a vocal minority, and the marginalized remain ignored.”
      • Use hypotheticals or real-world analogies to make the contrast stark.
    • Why it works: It forces the adjudicator to visualize the impact of the debate, making your side’s arguments feel more tangible and urgent.
    • Source: A staple in British Parliamentary (BP) and WSDC debating, popularized by teams like Oxford Union and Team Germany. The tactic is outlined in The Debater’s Handbook (2020) by Liam McArdle.
  2. The “Principle vs. Practicality” Tactic
    • What it is: Argue that the opposition’s case fails on either principle or practicality, while yours succeeds on both. This is particularly effective for Opposition Reply Speeches when the Proposition has a strong moral case.
    • How to use it:
      • Structure your speech around:
        1. “Even if we accept their principle (which we don’t), their case fails on practicality because…”
        2. “But their principle is flawed because…”
      • Example for “This house would abolish prisons”:
        • “Even if we accept that prisons are morally flawed (which we don’t, because they provide justice for victims), the opposition’s alternatives—like restorative justice—are unworkable at scale. But their principle is also wrong: prisons aren’t just about punishment; they’re about protecting society from dangerous individuals.”
    • Why it works: It preempts the “moral high ground” the Proposition often claims, forcing them to defend both their ideals and their feasibility.
    • Source: Common in WSDC and BP debating, particularly in Team USA’s 2022 WSDC training materials, which emphasize “two-layered refutation” (principle + practicality).
  3. The “Time Bomb” Tactic
    • What it is: Identify an unanswered argument from earlier in the debate that explodes the opposition’s case if left unaddressed. Frame it as a critical flaw they’ve ignored.
    • How to use it:
      • Open with: “The opposition has ignored a ticking time bomb in this debate: [argument]. If we accept this, their entire case collapses because…”
      • Example for “This house would ban private schools”:
        • “The opposition has never answered our argument that private schools entrench generational wealth. If we accept that private schools give rich kids an unfair advantage, their case—that parents should have choice—becomes irrelevant, because choice shouldn’t come at the expense of equality.”
      • Key: The argument must be central to the debate (not a minor point) and unrefuted by the opposition.
    • Why it works: It shifts the burden onto the opposition to explain why they’ve ignored a critical issue, making their case seem incomplete or evasive.
    • Source: A classic WSDC tactic, often used by Team South Africa and Team India. It’s discussed in The Art of Debating (2019) by Bo Seo, a two-time WSDC champion.

Bonus: Delivery Tips for Reply Speeches

  • Signpost aggressively: Use phrases like “Let’s be clear: the opposition’s case fails on three levels…” to guide the adjudicator.
  • Use “even if” arguments: “Even if you accept their [X argument], we still win because [Y].”
  • End with a “mic drop”: Close with a short, punchy line that summarizes your framing. Example: “This isn’t about freedom—it’s about fear. And fear is no basis for policy.”
  • Source: WSDC Adjudication Core Manual (2023) and The Debater’s Handbook (2020).

Key Sources Cited

  1. World Schools Debating Championships (WSDC) Adjudication Core Manual (2023). Link (See Section 4.3 on Reply Speeches).
  2. McArdle, Liam. The Debater’s Handbook (2020). Chapter 7: “Framing and Narrative in Debating.”
  3. Seo, Bo. The Art of Debating (2019). Chapter 5: “Tactics for Reply Speeches.”
  4. Harvard Debate Council. Narrative Debating: A Cognitive Approach (2021). Internal training materials.
  5. WSDC Grand Finals Footage (2022, 2023). Teams like Singapore, Australia, and Canada frequently use these tactics. Example: 2023 WSDC GF.

    Token Usage: 5,500

Conclusion

The main conclusions I have from this experiment is that, when prompted, all three of the above chatbots were able to provide reputable sourcing and logical arguments for how to build an argument. I think OpenAI’s explanation is probably the most in-depth and helpful for a beginner debater. However, I think the bluntness of AI is on display in all of the above responses. In particular, the lack of contextual advice that underscores so much of how arguments are built out throughout and debate and become relevant to the third speaker at the end of a debate is lost in the above analysis by these Chatbots. Despite this, I think the general points were completely fine and standard teaching for most debate students while being backed up by reputable debating sources.

Creating Images

Affinity Vector Image

An illustration of a purple and green flower logo with the words "Rem Cycle" in the middle.
Created by Remi Newhart | Affinity 2026 | Affinity Website

The Editing Process

The first image I created was for my site icon. I chose to use the platform Affinity to create this because it was recommended for creating vector images. Also, it was a new platform I had never tried before, so I thought I would give it a try. First, I used the “Cloud Tool” and adjusted the proportions to create the flower-like shapes. I then changed the color of the two flowers and used the “Stroke” tool to give the flowers colored outlines. I wanted to use outlines to bring more contrast to this design and to highlight the two shapes I used. Next, I used the “Artistic Text Tool” to add the name of my website in the middle. I also added a black outline to the letter to bolden the letters and add contrast against the mint green flower.

Design Choices

I chose to make a flower design because, quite frankly, I like flowers and wanted to incorporate it into my website somehow. In addition, I chose the two main colors that are featured in my website’s theme – purple and mint green. I am using these colors because they look nice together and offer a deep color contrast. I wanted something similar for my site icon so my work could be easily identified. The contrast between the mint green and dark purple lettering makes it easier for viewers to read. I downloaded this image as a JPG because that was the most recommended file format for saving images without distorting them. Learning new tools is never easy, but it was fun!

Canva Raster Image

An illustration of a yellow background with colorful flowers splayed across the bottom.
Created by Remi Newhart | Canva 2026 | Canva Website

The Editing Process

The second image I created was for my website’s header photo. I used Canva to create this because I am most familiar with this platform and wanted an easier method to create my second image. I find that Canva is easy to use and has many designs to choose from, especially since I have Canva Pro. I first started from a blank template of 1,920 x 1,080 pixels, which was recommended by WordPress’s website. I then used the “Background color” tool to change the whole background to yellow. Then, I selected a pre-made floral image from the “Elements” tab and attached it to the bottom. I used the “Crop” tool to adjust the height and width of the flowers so it would show nicely in my header. This was an easier process than my first image, but less creative because I did not create my own design from scratch.

Design Choices

I first background color to yellow because it is my favorite color and wanted to add something different to my page. I also thought the yellow would stand out nicely from my website’s purple background because they are complimentary colors! I chose the flowers because I thought they looked pretty all together and wanted something with a pop of color. I intentionally cropped the photo from the bottom without all flowers showing because I felt that it added some depth and movement throughout the header photo. Last, I saved this image as a PNG because I wanted to save it without the flowers being distorted.

css.php