Digital Image Creation

Who knew?

As discussed in my first post, I love to create! Some of my earliest memories consist of painting welcome home banners with my mom and brother for my dad when he’d come home from deployments, painting pumpkins, and making Christmas cookies with my mom.

If I could pinpoint a time that really got the ball rolling on my exploration of creation in my “adult” life (besides being in choir all of middle school), it would be taking pictures for the photography club that I wasn’t even in my 8th grade year. That club advisor went on to choose my art for our school yearbook cover that year (you know my 12 year old self was SICED).

Ever since then, I’ve not only enjoyed exploring things like photography, graphic design, drawing, modeling, event planning, content/video creation and fashion, but sharing these things with others in addition to learning from others that are more advanced in these areas.

Now. Despite my thorough exploration of digital creation, there is ALWAYS more to learn! So I am going to summarize some things that have been a review for me recently along with new things I’ve learned.

All the Things

If you are a human in 2024, you have likely heard of ‘pixels,’ or the smallest units of a digital image. Pixels, (short for “picture elements”) are tiny dots that combine to form an image, akin to atoms in a physical object. Each pixel can display a different color, and a higher number of pixels enhances image detail.

Resolution refers to the image’s level of detail, defined by the total number of pixels, expressed in width x height format. For example, “100×100 resolution” means the image is 100 pixels wide and 100 pixels tall, while “1920×1080 resolution” signifies an image that is 1,920 pixels wide and 1,080 pixels tall. More pixels contribute to a clearer and more detailed image.

There is so much more to know about graphics like rastor graphics (the photos on your phone) and vector graphics (your favorite brands logo), but I won’t get into the nitty gritty- just know there’s a world of knowledge about graphics!

Info drawn from Professor Cartland’s Canvas page!

My Site Graphics

I got to make two graphics for my site, and I’ll be so honest, my professor is probably going to tell me I have to go back and do them on different software or that they’re resolution is off, but that’s a problem for future me (I’m still learning-everything is FINE).

My Favicon

First of all, favicon is the best word I’ve ever heard. Second, it’s that lil logo you see on the tab at the top of your screen. Mine is a little heart connected to an upside down heart that I drew forever ago. For as long as I can remember, I’ve always signed these hearts with my name, and a couple years ago, my parents and I got it tattooed. I made this JPEG graphic on Vectr, using 512 x 512 pixels as it is the recommended sizing by WordPress for favicons. I wanted the background to be transparent, but I couldn’t figure out how to do it in Vectr, so I gave up.

Heart connected to and upside down heart.
My signature doodle, tattoo, and now favicon.

My header

I also created a header for my website! I am a Canva girly at heart, so I created a PNG vision board using all photos that I took in my camera roll- after all, my whole thing is about ‘loving yours,’ so I wanted it to be all of the moments in my life that I am grateful for. Friends, coffee, food, fitness, and family. I included a few quotes from Pinterest to which I’ll link their original home on the web. The WordPress theme that I have my website set to right now has a header of 1300 x 500 pixels, and the closest pixel sizing that Canva has is 1500 x 500, so I had to crop a little in WordPress, but that’s okay.

Mood board full of photos of friends and family smiling and laughing, food, a variety of drinks, and small quotes.

Small steps everyday.

Focus on the good.

She believed. She prayed. She planned. She executed.

Be happy with what you have while working for what you want.

Me and a collage go together SO well.

Creating Images

What are the Images?

Hand slapping emoji
Picture drawn by Coni Vigna. This work is licensed under CC BY-SA

My favicon is a hand slapping emoji. It is a reference to a fictional website called “The Slap” which is used as a blog site on the show Victorious. Victorious takes place in the same universe as iCarly, which my website is named after. I thought this was a cheeky homage to both shows and it didn’t take too much skill to draw which was helpful because I have never seriously drawn on a computer before.

Decorative image: "Putting the coni in iconic"
Picture drawn by Coni Vigna. This work is licensed under CC BY-SA

My header image is based on my personal motto: “You can’t spell iconic without Coni.” I’m not the most talented artist, so I found it was easier to make the header mainly text based, but the colors and design reflect my girly personality well. I decided to use that header as opposed to something else because I couldn’t find a specific image that represented me. Even if I could, I was struggling to find an idea that took up all the space. That was how I landed on my slogan. It’s cute and there’s no awkward, empty spaces.

The Process

I found the process for this project to be extremely challenging. I was originally going to use Vectr to make my images, but I found that website to be way too difficult to invest my time into, especially when I’m paying for Adobe Illustrator. I knew there would be more tutorials and help for Adobe and since I pay for it, I know I’ll continue to use it in the future, so that was the software I used. However, Adobe was also very frustrating to work. I think it’s good that this project made me finally sit down and figure it out, but in the moment it was terrible. I’m happy now, that I have a better understanding of it, although there are still things that confuse me, and things that I think are harder than they need to be. The favicon was made mostly with the pencil tool. I used it to make the hand and the yellow “slap” lines around it. Those were both made in 2 separate layers and then a third that I used to color the background all white. For the header, I used the pencil to make the pink squiggly frame, but the brush was used for the majority of the art. I freehanded the writing and the hearts.

File Types

Both the files were downloaded as PNGs. I know from my experience with using Canva, that PNGs are better for detailed and more high quality work (although, I don’t know if anyone can call this work high quality.)

Digital Art Creation in the Modern Age

Favicon Creation

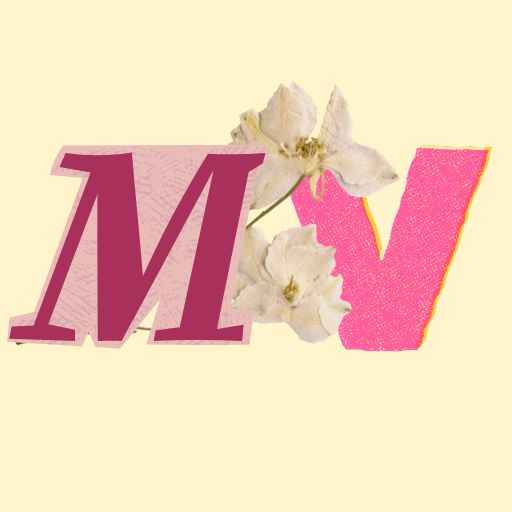
The letters M and V are cutout with a pressed flower behind it.
Photo by Meaghan Van Dyke.

Why This Favicon?

The favicon for this website includes my initials “M” and “V” cut out “scrapbook-style” with a pressed flower behind the two letters. I chose this design because the cut-out, scrapbook look of the letters represents the variety of different media and content-types posted on this website, while still giving it a more personal touch with the pressed flowers. The mark of a perfect favicon includes a memorable design that gives website users an idea of the person behind the website. These were important factors for me to consider while designing my favicon.

How Was It Made?

I created this favicon using Canva. As someone who uses Canva almost daily to design media for the Fine Print Club (an on-campus club I am the proud co-president of), I am very familiar with the tools in Canva and the elements that could be used to personalize the design. First, I chose the color of the favicon’s background, and then used the elements feature on Canva’s website to add the initials, text, and pressed flowers image. I did not use a pre-made template to create this, but rather personalized the ratio of the piece and started blank.

File Type

This favicon is a 512×512 px JPEG, the type of file suggested by the WordPress theme. This JPEG is also a raster graphic, with each individual pixel containing its own color.

Site Header Creation

The letters M, V, and D are cutout above the words "Meaghan Van Dyke Digital Studies" with pressed flowers in the bottom left and right corners.
Photo by Meaghan Van Dyke.

Why This Header?

I created this header to match the favicon of the site as closely as possible. Therefore, I used the same color background, the same color and style of initials, and the pressed flowers in each corner. The only noticeable difference is the pixilation and the “Meaghan Van Dyke Digital Studies” at the bottom. This was added to include the name of the actual site itself in the header.

How Was This Created?

The header, like the favicon, was created using Canva. I chose Canva for both file creations because of my familiarity with the format and the variety of customization options. Similarly to the favicon, I chose the color of the background first, and then layered the initials, subheading, and pressed flowers on top.

File Type

This header is a 2000x300px JPEG file, with the pixilation chosen at the recommendation of the WordPress theme. Since this file is a JPEG, it is a raster graphic.

Digital Image creation

Additions to my blog page

Why I chose these images

For my blog banner, I wanted something simple that represented me. In the future, I want my blog to be space where I talk about music, pop culture and share photos. I think these three icons feature what I want my blog to become. For my favicon, I wanted my initials to be incorporated somehow with a simple background. I did black letters for a high contrast against the white background.

The process and software

I made my favicon first, on Canva initially. They have easy, pre-made designs that I customized to fit my aesthetic. I put it on Vectr so I could download the picture with a high resolution. Then on Vectr, I created my banner. I had a hard time trying to get other designs to fit properly. So I opted to do a simple three icon design that fits what I will put on this website. Vectr has simple irons to choose from, so I just picked some of those to add to my banner.

What file types

For my favicon, I initially downloaded it on Canva as a PNG, and then went to Vectr to download it as a JPEG. For my banner, since I created it on Vectr, I downloaded it originally as a JPEG. The reason I chose to download them as I did was because that was how the website recommended. Vectr doesn’t let you choose a different file type without buying the premium version.

My blog banner and favicon

A grey camera, grey phone, and grey headphone against a white background.
Via me on Vectr
An "E" and a "K" in a grey circle against a white background.
Via me on Canva and Vectr

Digital Image Creation

What are these images and why choose them?

There are two separate images I chose for this project. The first one is a googly eyed face. I didn’t want anything too serious as that would not best represent me. This image was created using the white board on Canva. There were different shapes and pen sizes to choose from. I call this ‘looking for inspiration’ because the creature is all eyes and ready to observe. I am a carefree and semi goofy person once you get to know me, so I created this to represent the not-so-serious-side of Danaja that not many people get to know.

two googly eyes staring into space
Creator: Danaja

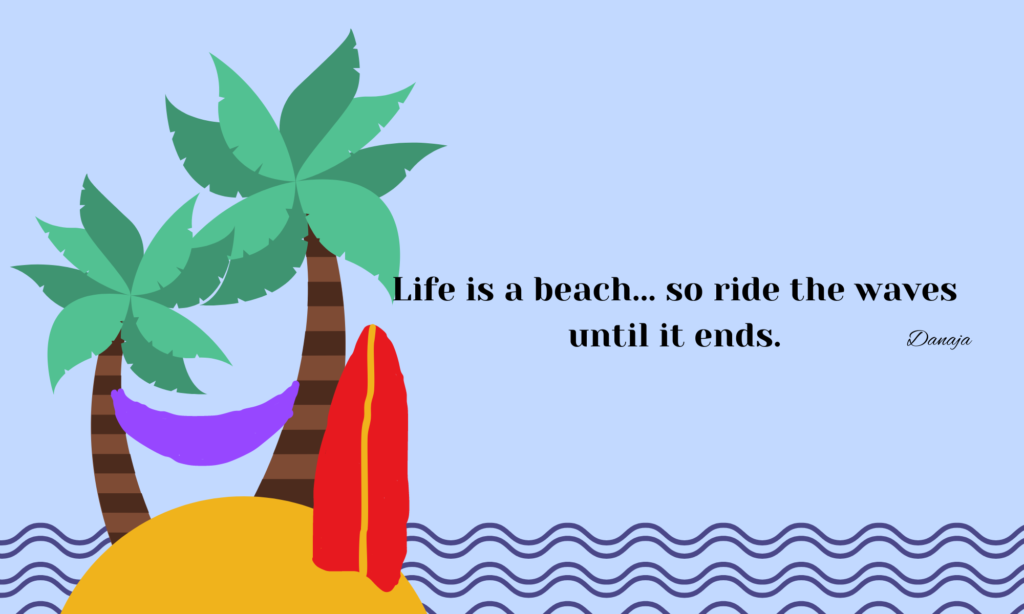
The next image I used is an image of my own. I love this image because it reminds me of my favorite past time, Chillaxin’ (chilling out and relaxing). This icon consists of two palm trees holding up a hammock. The surfboard is a reminder to try your best to surf through life. With all the ups and downs, do your best not to get dragged out to sea. Although I am not the best artist, I hope that I conveyed the message of vacationing. I made this icon using the white board on Canva as well along with the help of a template. Both of the files I used are PNG files. PNG stands for Portable Network Graphic. I used PNG files because they have a brighter and broader color palette to work with. The more colors, the more options you have to get it as close to what you imagine.

two palm trees on a small island holding up a hammock and a surf board on the side

Images

Header

Foggy hills with trees in the background. A box with the text "What is happening?" and "Is this a fantasy?" in the center.
Created by KelseyAnne Coleman, Background Image from Vectorpea

Logo

Uppercase K with uppercase T overlayed with two branches on either side
Created by KelseyAnne Coleman

The images above are the header and logo for my site. I decided on them because the first try of making them didn’t work well so I tried with different images. The header image was chosen because I liked the way it looked. And the logo design I thought would show up will. I am not very creative, but I used Vectorpea to choose the header and Canva to make the logo.

The background image of the hills in my header image was suggested when I put in the pixel size. The image had the words “Hello World!” and “What a beautiful day.” in the center of the image. I changed “Hello World!” to “What is happening?” and kept it in the center of the image. I changed “What a beautiful day” to “Is this fantasy?” because I liked it and thought it with well with “What is happening?” and the name of my site “KelseyAnne’s Thoughts”.

The logo image was made from a template that someone made on Canva that was available for public use. The template was made by @syammasfitria, links to original design. I liked it but I needed to change the initials to match my site, it also had words below the initials that I got rid of. I used “K” and “T” because they represent the title of my site. You can see the initials on the site logo when it is on the tab.

I chose to download the header as .JPG because that was the most familiar type of file to me. The article from CRO:NYX suggests that it is the most recommended file type for images in a website. The logo was downloaded as a PNG because that was the default to download on Canva. PNG was also recommended for icons which is what my logo is. I also think that the other file types suggested in The Ultimate Guide to Website Images [2023] didn’t seem like they would be the right fit for what I was going to do with the image.

Attributing knowledge: navigating copyright on the internet

Copyright on the web

Copyright: what is it, and why is it necessary?

Image of hundreds of app icons.
Image by geralt, free for use under the Pixabay Content License: Pixabay

Copyright can be defined as “the legal protection that grants the creator of an original work exclusive rights to its use and distribution”. This means that when someone creates material, they automatically own the rights to it just by virtue of its creation; however, in order to take legal action over unauthorized use of the content, the work must be filed with the US Copyright Office. Copyright is important because it not only protects someone’s work from being stolen and inaccurately portrayed as someone else’s, but also prevents others from using the work in ways that the creator did not consent to and does not agree with.

The use of copyright on my site

For all of the content I create on my website, I chose to use the Creative Commons license CC BY-NC 4.0, which means that others using my work must give credit to me, as the creator, and that my work can only be used non-commercially. I chose to use this license because I felt that it was important to receive credit for my ideas, and that the use of my ideas for commercial gain was unfair.

Ethical collaboration: the sharing of ideas

Image of three desktop computers, emitting lines of information.
Image by geralt, free for use under the Pixabay Content License: Pixabay

Why is attribution important?

Properly attributing others’ work and respecting their wishes in regards to its use and distribution is important to take into consideration when using the internet, for multiple reasons. The first of these is avoiding the legal action that could come with improper use of someone else’s work. However, it is also important to take into account the creator’s intentions when using their work, as it is their intellectual property. By creating something, they automatically have ownership over that content, and therefore have a say in how or why it is used.

How to properly attribute content

If the creator supplies the method by which they would like to be attributed, then the obvious solution is to follow their guidelines. However, if they do not, there are other ways of crediting work. The first of which is naming the creator and supplying a link to their website or other internet presence. If the creator is unknown, then simply state that and provide a link to where the content was found. In addition, if the material used another original work, include both sources to properly credit both creators.

Digital Image Creation

My Images

My “favicon” is a “K” in pink with the name “Katie Royle underneath. The color pink represents how I go about life. Not only is my room covered in this color, but it represents a sense of vibrance that I try to display throughout my days. For my Site Image, I decided to stick to the theme and use a pink “K.” When people click on my link, I want them to feel happy from the colors, while understanding what they are clicking on with the letter “K.”

My Process

I decided to use Logo Maker to create these icons. These files are JPEGs as I felt it was a common file type that viewers will be able to see clearly.

The ,"Favicon," that has the name, "Katie Royle," in pink with a large "K."

Image found on Design

The site header that is a large "K."

Image found on Design

    Digital Image Creation

    Favicon

    My Image & Why

    Red circle containing yellow and blue shapes. Has the letter 'A' in the top left.
    Favicon Alexa Kincaid (CC BY-N.D 4.0)

    I wanted my favicon to be simple, yet funky. I also felt that it stylistically matched my site theme. I’ve always had a love for abstract art and I feel that this unique favicon exemplifies my personality and creativity. I included the ‘A’ as a nod to my site name (amkincaid.net).

    Header

    My Image & Why

    Abstract image containing red, yellow, and blue circles, lines and squares. Contains the words "My Blog," "DGST 101," and "Alexa Kincaid."
    Header Alexa Kincaid (CC BY-ND 4.0)

    Once again, I wanted my header to be creative and reflect the site’s theme. I expanded upon the simple shapes I used in my favicon image, in order to ensure continuity throughout my creation process. I included ‘My Blog’ to serve as my site name, as well as including my name and the class that this blog is primarily used for.

    Creation

    Process and Software Used

    I used Vectr to create this image. I went through a trial and error process of learning to use the website and what each of the tools did, but soon found my groove and really just went to town on my image. I first sketched a rough idea of what I envisioned and then let me creative side shine through in the digital reproduction of this image. I was sure to use high contrast wording, for example on my header, I used black text on a white background. This high contrast wording is crucial to obtaining attention and making it more accessible for those visual processing abnormalities.

    File Type Chosen & Why

    I downloaded my favicon file (512×512 pixel) and my header file (1920×1080 pixel) as JPEG images. JPEG images are typically raster graphics, meaning that each pixel on the image has a specific color that altogether create an image. This is not necessarily the best option, as the image can appear blurry once stretched out, but it is common for website building platforms to require these file types. I ultimately chose the JPEG for an admittedly silly reason: it was the default file type when downloading my creation off of Vectr. That being said, I ensured that I had the right pixel size before download to ensure my image would have the best quality possible when applying it to my site.

    Creating digital images

    My images

    Icon

    Purple bow with yellow underneath, used white lettering to fill in "Kenley's Blog"
    Created by Vectr with design by Kenley, 2024.

    I choose my first imagine to be a purple ribbon for my website. I used the website Vectr. I adored the purple color when I was looking at different colors. I liked the yellow underneath with a little white on the middle to state “Kenley’s Blog”. I thought about editing the name to fit better and be more visible like 2 initials instead of words. However, I like the tiny bit of white as an offset from the purple and yellow.

    Header

    Charlotte (my cat) over a brick background with Kenley's Blog overtop.
    Created using Photopea and vector with design by Kenley, 2024

    My header imagine is my actual cat. I used Photopea for the background of the brick and putting the photo on it. I created a blur on it after removing a whole bunch of white space around charlotte. Then, I used vectr again to create the writing on it. I am not a creative person therefore I wanted to use as many resources as I could. I choose to use a picture of my own cat Charlotte because I didn’t want to use a cat from one of the sites. I also choose the purple to blend with the dark blue/purple theme to not create an eyesore. Once I picked the image, I used PicResize to shrink it to properly fit without any blurriness that wasn’t intentional.

    Image types

    For my Icon, I used a JPEG file. I choose this type because it was what was the choice when I went to properly download the image. For the cat image in the header, it is JPG file. I also choose this because it was the option given. I prefer the JPG file over JPEG because I feel as though the image is stronger and clearer.

    Process of creating

    For my first image of Kenley’s Blog, I wanted something basic. Due to it being small for the website icon, I didn’t want it to be very detailed and layered. I added the ribbon and then wrote overtop of it with white lettering. For the cat image I used an already created a brick background and then added Charlotte overtop of it. After this, I took a long time trying to see how much I should cut out. I ended up choosing Char to be larger then the background of the brick. I choose black lettering because I wanted to offset the purple.

    css.php