Interactive Game Project

Introduction

About the Game

For this project, I made a a virtual breakout game using the website Flippity.net. The way the game goes is by clicking a red lock and typing in the answers in an empty block that was given. After typing in the answer, you click the key. If you get the answer correct, it will go back to the first page with the locks and the lock you answered correctly will unlock and turn green. If you get the answer wrong, there will be a sound that sounds like a lock not opening because the wrong key is being used. You can press the lightbulb to get a hint for each question. When you finally answer all of the questions and all the locks are green, you can refresh the page to start over. This is meant to be an educational and interactive game about tea.

More Information

This game is based on my podcast and video titled, “The Science Behind the Perfect Cup of Tea.” I got all the information I talked about on those platforms from these two websites:

The Science of the Perfect Cup of Tea The Science of Tea

While playing the game, you can either look at those two websites for the answers or either listen to my podcast or watch my YouTube video for the answers:

Process of Making the Game

Process

After going to Flippity.net, I clicked on the Virtual Breakout game option. The website gave me instructions on how to create the game.

Flippity Virtual Breakout game creation instructions.

First, I was given a Google Sheets template where I can edit the clue, hints, and answer sections. Next, after I filled out the Google Sheets template, I went to files, clicked share, then clicked the “Publish to web” option.

Google Sheets template used to create game.

I then copied the link that was given to me and clicked on the “Get the Link Here” tab on the Google Sheets Template. As states by the instructions, I pasted the link on cell A3, and clicked on the link on cell A5 to see the game that I created.

Google Sheets template showing how to publish game to the web.

Message

Since this was supposed to be an educational game, I wanted it to be like a quiz. I was thinking about flash cards but decided that the virtual breakout game was a more interesting concept. I want viewers to memorize the things I discussed on my podcast and YouTube video. In my opinion, this game was a good way for viewers to fully memorize and understand the things that I have discussed about tea.

Final Product

This is the game that I have created:

The Science Behind the Perfect Cup of Tea Virtual Breakout Game
Interactivity Project

Diversity in Barbies

For my project, I explored how the groups Barbie represents have changed since the dolls were first produced. I think my project illustrates how slowly Mattel integrated diversity into Barbie. The idea that girls can be anything is central to Barbie’s marketing, yet the dolls tend not to reflect the true variety of people, though the brand is surely developing.

Sources

I used information from

Mattel’s History of Barbie Diversity

Image titled “The First Black and Hispanic Barbies” from page

History.com’s “Barbie Through the Ages”

Image titled “Original Barbie” found in this article

Mattel’s Barbie Fashionistas Dolls

Images titled “Barbies with Different Body Types,” “Barbies with Physical Disabilities,” “Barbies with Down Syndrome,” and “Barbies with Autism” found on this page

The National Down Syndrome Society’s Barbie Dolls with Down Syndrome

Interactive Timeline

Creating the Timeline

I used the Nightlabs timeline creator to illustrate this change in representation. I thought it would be the best format because it is an organized way of presenting chronological information. I made one slide in the timeline for each new group represented. The images I chose are copyrighted; however, I believe that they are within fair use because I am making commentary. I also direct my viewers to the original source of each image in the blog post and timeline. I had a difficult time embedding it because I didn’t know about WordPress’s custom HTML feature. I did a quick Google search, learned how, and successfully embedded my project.

Interactive Game Exploring the Concepts of Blue Light

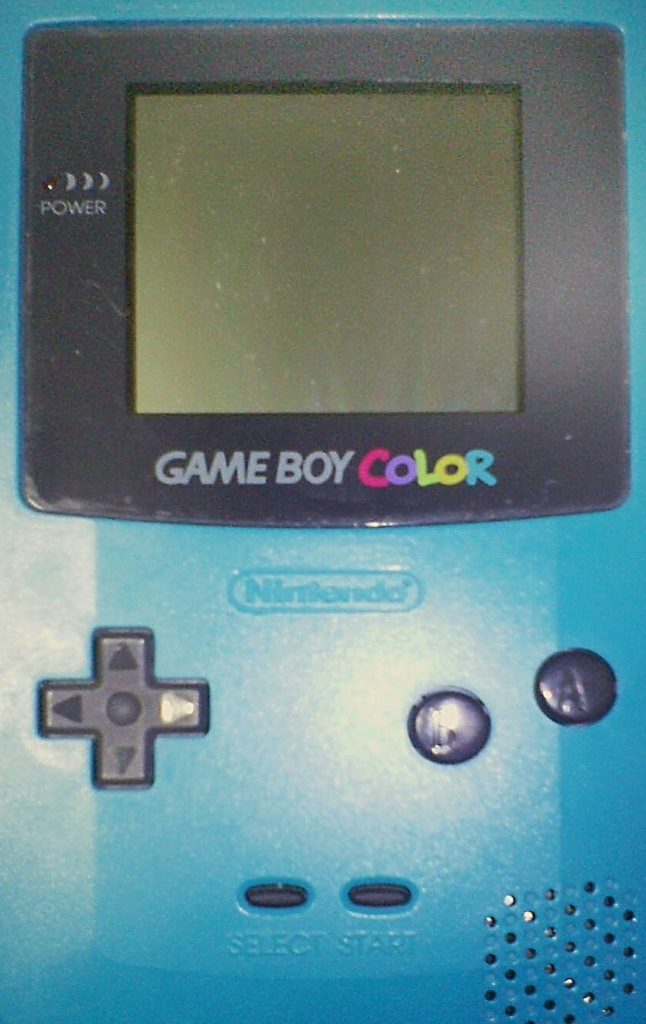
Blue Game Boy Color with speaker in the bottom right color. In the middle it has the Nintendo logo, with the text "Game Boy Color," and a screen above that where the game would be played.
Game Boy Color by Pia Carrot, licensed under CC BY-SA 2.5.

Topic Introduction

My topic explores the truth about how blue light affects sleep. I consider this a myth because its not just blue light. Rather, all light has some sort of effect on sleep. Additionally, I explain the science behind this and the chemical, melatonin, that causes you to get tired. Lastly, I provide tips to help reduce the affect light has on sleep.

Sources

Melatonin and Sleep – NIH

Exposure to Room Light before Bedtime – JCEM

Melatonin Suppression by Light – NIH

Circadian Rhythm – Sleep Foundation

Melatonin – Mayo Clinic

The Game Itself

Blue Light Game

Instructions

My game is connections which is where you have to match things into 4 unknown categories but drawing similarities to put them together. If you get them correct, the category will be revealed. Good luck!

Credits

Flippity.net (provided the game template)

Blue Game Boy (image used)

Process of Making the Interactive Game

I selected this tool because it combines interactive elements and concepts. It allows the user to internalize the information discussed in my podcast and video. Additionally, it helps to get my point across. The connections game specifically is fun for the user and helps them to draw similarities between each concept. I enjoyed being able to make something that gives my audience some control in how they interact with my topic. One of the biggest challenges was that I originally was choosing a crossword puzzle but I had to abandon that one because it was only available for printing, not online.

My Interactive Game

My Game

For my online interactive game, I chose to stay on theme and make an interactive game based on choices you have to make as a waiter or waitress during a dinner rush. Being a waiter or waitress can be difficult, especially when the right answer always leads to the wrong one. What I mean is that with each decision, you leave another responsibility behind. The Bureau of Labor Statistics article Waiters and Waitresses gives great insight into what it can be like being a waiter or waitress. Their article includes discussing orders, serving food, checking on customers, and handling payments. I also found O*NET had an interesting online list also called Waiters and Waitresses. They give a more indepth list of some of the things that waiters and waitress need to now how to do and do well. They also gave an importante scale which I found to be very helpful in putting things into perspective.

The Process

I decided to use Twine because it made it so easy to make my story connections. Once I came up with a scenario, if I wanted to make a connection to the next scenario, all I had to do was put the title in double brackets like this: [[Title]], and the game would populate it for me. Deciding on the theme for my project was simple since I knew I wanted to continue using the waiter/waitressing narrative for my game. While building the game was easy, I think the most difficult part was converting the URL so it would be accessible through my blog post. Once I realized I just had to move some things around and add my domain name, it was easy to attach to this blog post.

How to Play the Game

What would you do if you were a Waiter?

Learning how to play a new game can be overwhelming sometimes, but luckily, the game does all of the work for you. You will be presented with a screen that gives you a waiter or waitress scenario, and your job is to decide what you would do in that situation based on the options given to you. Once you select one of the options it will take you to another screen where you will continue on mkaing decision until you reach the end of the game.

Meal Prep Randomness: An Interactive Activity

Introduction

Meal prepping is a useful way to save time, money, and improve your overall nutrition. This activity will serve as a beginner’s guide to finding recipes for, and effectively storing, bulk meals that can feed you for the whole week. There is a large community online who swear by the benefits of meal prepping.

The Process

I used a website called Flippity to create the first and last parts of this activity. Flippity is a free platform providing quick and easy educational tools for anyone to use. I believe Flippity, as a beginner-friendly platform, was the right choice for my activity given my own limited experience with coding/game creation, as well as the simplistic nature of meal prepping. Meal prepping is a free-form idea limited only by two things: imagination and resources. The first part of the activity (the ingredient wheel) tackles imagination by allowing the user to explore the random ingredient combinations until they are inspired. The third part of the activity (the questionnaire) tackles resources by asking the user basic, yes-or-no logistical questions: can I store this safely? Can I reasonably eat this many times over? And so on.

In other words, I chose to use two different Flippity activities to represent two different facets of meal prepping: the imaginitive side and the logistical side.

The only challenges I faced while making this project were decisions on which Flippity activities I wanted to use. I’d fallen in love with the platform, so that was a given, but I didn’t know how to conceptualize something as physical as meal prepping into the digital world. I like to believe I figured it out in the end, though!

The Activity

Step 1: The Ingredient Wheel

View the ingredient wheel here.

Directions: Navigate to the link above. Hit the large Spin Wheel icon on the right side of the screen to scramble the ingredient options. Do this until you find an ingredient combination that interests you.

Step 2: Supercook

View Supercook here.

Directions: Supercook is just one of the many websites I use to find recipes for meal preps. On the left side of the screen, type in (or select the icons correlating with) each of your four ingredients. See what recipes you can find on the right side of the screen. Open at least two recipes in separate tabs and save them for the next step. Do not “favorite” any recipes, as Supercook requires you to have an account to do so.

Step 3: The Questionnaire

View the questionnaire here.

Directions: Navigate to the link above. Answer the nine-question quiz to the best of your ability to determine whether or not your recipe may be able to be meal prepped. Not all recipes are compatible with meal prep, and that’s okay! Keep looking for recipes that score high on the Probably side of the “can I meal prep this” scale.

Credits

The ingredient wheel activity and the questionnaire activity were designed by Frankie Wulf on the platform Flippity.

Step 2 of the activity is possible thanks to the website Supercook.

General information contributing to the creation of this activity was provided by the FDA’s refrigeration guidelines.

Meal Prep Randomness: An Interactive Activity

Introduction

Meal prepping is a useful way to save time, money, and improve your overall nutrition. This activity will serve as a beginner’s guide to finding recipes for, and effectively storing, bulk meals that can feed you for the whole week. There is a large community online who swear by the benefits of meal prepping.

The Process

I used a website called Flippity to create the first and last parts of this activity. Flippity is a free platform providing quick and easy educational tools for anyone to use. I believe Flippity, as a beginner-friendly platform, was the right choice for my activity given my own limited experience with coding/game creation, as well as the simplistic nature of meal prepping. Meal prepping is a free-form idea limited only by two things: imagination and resources. The first part of the activity (the ingredient wheel) tackles imagination by allowing the user to explore the random ingredient combinations until they are inspired. The third part of the activity (the questionnaire) tackles resources by asking the user basic, yes-or-no logistical questions: can I store this safely? Can I reasonably eat this many times over? And so on.

In other words, I chose to use two different Flippity activities to represent two different facets of meal prepping: the imaginitive side and the logistical side.

The only challenges I faced while making this project were decisions on which Flippity activities I wanted to use. I’d fallen in love with the platform, so that was a given, but I didn’t know how to conceptualize something as physical as meal prepping into the digital world. I like to believe I figured it out in the end, though!

The Activity

Step 1: The Ingredient Wheel

View the ingredient wheel here.

Directions: Navigate to the link above. Hit the large Spin Wheel icon on the right side of the screen to scramble the ingredient options. Do this until you find an ingredient combination that interests you.

Step 2: Supercook

View Supercook here.

Directions: Supercook is just one of the many websites I use to find recipes for meal preps. On the left side of the screen, type in (or select the icons correlating with) each of your four ingredients. See what recipes you can find on the right side of the screen. Open at least two recipes in separate tabs and save them for the next step. Do not “favorite” any recipes, as Supercook requires you to have an account to do so.

Step 3: The Questionnaire

View the questionnaire here.

Directions: Navigate to the link above. Answer the nine-question quiz to the best of your ability to determine whether or not your recipe may be able to be meal prepped. Not all recipes are compatible with meal prep, and that’s okay! Keep looking for recipes that score high on the Probably side of the “can I meal prep this” scale.

Credits

The ingredient wheel activity and the questionnaire activity were designed by Frankie Wulf on the platform Flippity.

Step 2 of the activity is possible thanks to the website Supercook.

General information contributing to the creation of this activity was provided by the FDA’s refrigeration guidelines.

Video Project

Information

information used from the Youtube channel Beauty Within

Beginners guide to skincare.

How does sunscreen work?

The Process

Videos were shot on my iPhone with audio recorded using my personal mic. They were recorded separately then overlayed together along with my B-roll footage in Clipchamp. Additional elements were mainly from Canva, Pexels, and on from Tenor. I chose Clipchamp as my editing software as it was the most flexible and intuitive for me to use. The final product was uploaded to YouTube as I could not figure out how to make SharePoint work.

Attributions

Title and Outro screens made using Canva

Skeleton gif from estoy on Tenor

Photo by Inna Mykytas from Pexels

Photo by Vika Glitter from Pexels

Photo by Anna Shvets from Pexels

Photo by Ravinder Ravi from Pexels

Photo by Ivars from Pexels

Photo by Anna Frolova from Pexels

Photo by Mikhail Nilov from Pexels

Gamification Prjoect

Introduction

Soccer players need more than technical skills to perform at a high level. Strength training can help athletes improve speed, power, balance, and overall performance on the field. It can also help reduce the risk of injuries by strengthening muscles and joints.

Soccer is a sport that requires much more than technical skill. Players must be strong, fast, and physically prepared to compete throughout an entire season. Strength training has become an important part of athletic development because it can improve overall performance while also helping athletes stay healthy. According to the NSCA’s article on resistance training and injury prevention, properly designed resistance training programs can help reduce injury risk and improve physical performance. Additionally, the article The Benefits of Strength Training for Soccer Players explains that strength training can improve speed, power, balance, and on-field effectiveness, all of which are important for soccer success.

Sources

The Benefits of Strength Trainning

Resistance Training and Injury Prevention Info

This interactive project allows users to experience how training decisions can impact a soccer player’s season. By making choices about strength training, recovery, and consistency, users can see how different habits lead to different outcomes and better understand why strength training is such an important part of soccer performance.

Interactive Project

Instructions

In this interactive story, you take the role of a soccer player preparing for a competitive season. You will make decisions about training, recovery, and consistency. Each choice leads to different outcomes that demonstrate how strength training habits can affect performance, injury risk, and overall success during a soccer season.

Click the links provided throughout the story to make your choices and see where your path leads.

Credit Section

Projected created using Twine, https://twinery.org

Project hosting, itch.io, https://itch.io

I did not use any vides or images in my project.

The Process

For this project, I used Twine to create an interactive story about the importance of strength training for soccer players. Twine was a good choice because it allowed users to make decisions and see the results of those choices. I have also already used twine multiple times in previous coding classes, so it was easy for me to use. Players could choose whether to strength train, recover properly, and stay consistent throughout the season, leading to different outcomes. The biggest challenge was making sure all of the story paths and links worked correctly. After testing the project, I uploaded it to itch.io so it could be easily accessed through my WordPress blog.

So, What’s the Deal with Post-Production of Podcast Audio

Animated image of a young boy taking a deep breath with the diaphragmatic breathing written over his head in an arch

My First Podcast – Diaphragmatic Breathing

The Process

For this particular podcast, I chose to use my Yeti X Blue microphone with my Audiotechnica headphones. Specifically, I used the cardioid mic pattern to achieve the highest quality audio. This mic pattern provides noise isolation, feedback resistance, and versatility. I paired this equipment with GarageBand as my DAW. I recorded my audio directly into GarageBand. From there, I erased the “dead air” at the beginning and end of my recording. I used the track controls to moderate problems with reverb. Next, I added a new track beneath my recording. I opened the loop manager and chose a loop that sounded similar to breathing – my theme. I drug it onto the track. From there, I altered the fade in and out to not give it an abrupt feel. I added pre-made loop harp music at the end, in the same manner. As for my own sounds, I added two new tracks under the previous ones. For the first, I drug the playhead to where I wanted the audio. Then, I hit record and recorded myself taking a deep breath in, for the amount of time I desired. I adjusted the fade in and out next. For the second track, I did the same process, but a different sound. This time I did a large exhale timed to fit into my podcast. I also adjusted the fade in and out for those. Finally, I isolated each track to give a good listen. Then, I listened again to the audio as a whole.

Attribution and Useful Links

The Cleveland Clinic has a very useful page that fully explains Diaphragmatic Breathing.

John Hopkin’s has a similar page that can guide the listener in the correct direction.

The intro and outro sounds are loops pre-loaded into GarageBand. The image at the top of the page was created using Canva.

Transcription

  • Mandy Speaking
    • (00:02)Welcome. Today we are doing a two-minute micro session on the absolute ultimate hack for stress
    • (00:07)management and musical performance, diaphragmatic breathing. By breathing using only your chest,
    • (00:13)you’re telling your brain to stay stressed. Let’s take 90 seconds to make one positive
    • (00:18)change that your body will thank you for. Take a seat in a chair with your back straight and
    • (00:23)your shoulders relaxed. Place your left hand on your chest and right hand on your belly.
    • (00:28)The goal is for the left hand on your chest to not move at all. You should only feel the
    • (00:34)hand on your belly slowly moving back and forth with every breath. First, close your eyes. Imagine
    • (00:41)you are pulling air all the way from your toes, filling your lungs from the bottom up. Breathe
    • (00:47)with me in through your nose, from your toes, filling your lungs for a count of four.
    • Starting
  • [Breath In]
    • (00:53)one, two, three, four. Imagine you are filling a balloon
    • (01:01)with air all the way from the bottom up. Breathe with me in through your nose, from your toes,
    • (01:01)with your stomach, pushing your right hand outward. Now, purse your lips slightly and exhale like you
    • (01:07)are extinguishing a candle, slow and steady.
  • [Breath Out]
    • Exhale for one, two, three, four, deflating the
    • (01:16)balloon under your right hand all the way until no air remains. Allow the body to relax as you
    • (01:23)exhale. Again, feeling no movement from the left hand on your chest, only the right hand on your
    • (01:33)to breathe thoughtfully. Just three to four minutes of breathing exercises twice a day can
    • (01:39)calm nerves for a meeting, assist in sleeping, or for any anxious situation. I promise your body
    • (01:45)will thank you. Use your breathing exercises to take control of your breathing and your health.
    • (01:51)Catch you next time on Mandy’s Digital Foray.
  • [Outtro Harp Music]
css.php